- HubPages»
- Games, Toys, and Hobbies»
- Computer & Video Games»
- Video Wargaming
A Zerg vs Zerg Guide for Starcraft 2: Heart of the Swarm

Overview
Zerg vs Zerg in Heart of the Swarm remains relatively unchanged from its Wings of Liberty origin with the exception of one thing: Mutalisks are now the unit of choice for the mid-game. With the Infestor's Fungal Growth being made into a projectile coupled with the faster regeneration and movement speed of Mutalisks, this leads to the current Muta-dominated metagame. The basic flow of the match-up involves:
- In the early game, 6/7/8 pools and Spine Crawler rushes are still around. Not much has changed in the early game.
- After the natural expansion goes down, Zergling-Baneling fights are still a common occurrence.
- Once aggression has ceased, both players begin to tech into Lair and eventually into Spire.
- Once the spire is down, the fight for the third begins. This is the most crucial part of the game as the player who manages to get his third up faster often wins the game.
- If both players manage to put down a third base, the game continues into MutaWars and in the end, whoever has the most Mutalisks and most upgrades win.
The ZvZ metagame is still quite reactive you should still adapt depending on what you scout.
The Build Order
Most players open up with Spawning Pool first but I tend to go Hatchery first. Spawning Pool first is often safer but I just feel more comfortable going Hatchery first. In the end, it all boils down to your preferences. The build order goes like this:
- 15 Hatchery
- 15 Spawning Pool
- 17 Overlord
- 17 Extractor
- Once pool finishes, get a queen. Once expansion finishes, get another queen there. Make 2 zerglings for scouting.
Notes:
- If you don't see an expansion from my opponent, get a Baneling's Nest with your first 50 gas then go Zergling speed with the next 100.
- If your opponent expands, the first 100 gas goes into speed with the next 50 gas into Baneling's Nest.
- Lair once the natural and the main are sufficiently saturated.
How to Spot a Zergling Aggression/ All-in
- His natural expansion is still empty while you are getting yours droned up.
- He doesn't have a spine crawler.
- He kills your Overlords that are near his natural.
The Early Game
The early game is still the same as Wings of Liberty. Opening Roaches however, has become quite uncommon. Roaches, while keeping you safe versus Zergling Banelings, tend to delay your tech and impedes your Mutalisk Count. A Baneling Nest is a requirement and you should either get it before or after speed depending on what you scout. Remember to keep an eye on the minimap. The early game is where most sneaky stuff happens, and you should be on top of it through the minimap.
Tips:
- Always send your first Overlord near his base to spot for an expansion. Once he places an expansion, move that Overlord to spot his exits.
- Once your Baneling Nest finishes, immediately morph 2 defensive banelings.
- You can make an extra queen and keep her on hold position near the ramp between the main and the natural expansion. If you see a Zergling all in coming, grab your natural queen and have the two of them block the ramp and move your drones to your main. It's always better to lose your expansion than to lose the game.
- Keep your Zergling active. If you spot an unusually high number of Zerglings from your opponent, he's going to all in/be aggressive. Prepare with a spine crawler and morph a few banelings as needed.
- Always keep up your injects. The early game is where injects and larva management matter the most
- Unless you see your opponent morph a ton of banelings, only morph 4 banelings and only more as needed. Gas is extremely important and the more gas you spend, the less gas goes into Mutas later on.
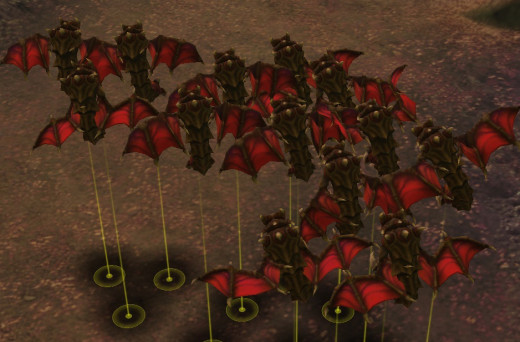
The MutaWars
Once the aggression stops and both players start to tech to Lair, the midgame starts. Since you are going Mutalisks, a timing push can still kill you so you still need to scout.
Defending a Timing Push
If you see a Roach Warren and one or two Evolution Chambers, he will be pushing out so put down two to three additional spines and morph banelings. If you scout a timing push, abandon the plan of saving gas for Mutas and go crazy with Banelings. Be on top of your injects, it's going to be crucial. Once you see him push, grab a pack of Zerglings and counter attack him. When engaging him, try to surround him with your lings where your Spine Crawlers can reach them.
Scouting a Spire
Most Zergs go for the Spire but you still need to scout. Send in an Overseer to see his main. If you don't see a spire but you also don't see a Roach Warren and/or Evolution Chambers, it's going to be Mutas.
In a MutaWar scenario, the third is the most important factor and most games can be decided on whether or not the third gets up. After putting down your spire, you can either deny your opponent's third or stay on the defense and prevent him from denying yours. Just remember to put down that third. Morph a few defensive banelings near your third to deny any Zergling run-bys.
Remember to bank minerals and gas and morph a few Overlords preemptively so you can make Mutalisks as soon as the Spire finishes. A Mutalisk costs 100 minerals and 100 gas so try and keep them even when banking. If your mineral count goes higher than your gas, spend it on Zerglings or drones, just be sure to keep up on your injects so you'll have larva for the Mutalisks.

Playing the Mutalisk Game
If he went Spire as well, get the Air Carapace upgrade before you make Mutas. The Mutalisk Glaives attack bounces to two additional targets and the Carapace upgrade reduces each bounce damage by 1 while the Air Attack upgrade only increases the main attack by 1 and a third after each subsequent bounce.
Remember to keep upgrading. Every time an upgrade finishes, you should be looking to attack, especially if he's behind in upgrades. Every bit of gas not spent on upgrades should be spent on Mutalisks and you must try your best to retain your Mutalisk count.
In attacking, try to set up two-prong attacks with your Zerglings in one side and with Mutalisk in another. If you can't do damage, try sniping extractors so your opponent falls behind on the gas income.
Always keep your opponent in the back foot with constant aggression and map activity. Although you are going to be aggressive, try to pick your fights very well. When attacking, try to group up your Mutas. Grouping them up reduces the chance of your opponent picking off the weaker ones and since they will be attacking at the same time, you can dart in and out faster. If you fall behind on Muta count, you can lose the game so keep those Mutalisks alive. Try and cover your bases as well. Always leave a couple of banelings and spore crawlers in each base.
If you lost a bunch of Mutas or you're behind in upgrades, you must play defensive. Avoid any confrontation with his Mutas and use Zerglings to keep him on his toes. If you need to fight, do it above a few Queens and Spore Crawlers.

End Game
You cannot usually transition out of a MutaWar. The game usually ends on which side loses his Muta Count first. The match up is currently a game of small advantages, as each tiny advantage can snowball you into the win. Always try to eek out advantages. Take down undefended bases, keep killing Extractors and keep his Muta Count low without dropping your own. Eventually it will all boil down to one massive battle. You can have your Zerglings help by keeping them beneath the Mutalisks when they engage. The Zerglings can absorb Glaive bounces and can keep damage off of your Mutas.


 - Popular Strategy Games")


